- July 21, 2026
QuickBooks Bookkeeping for Amazon FBA & Shopify | Thelonex

The Exact QuickBooks Setup Every E-Commerce Store Needs in 2026
The Exact QuickBooks Setup Every E-Commerce Store Needs in 2026
Meet Alex. He ran a thriving Shopify store selling fitness gear. Sales hit $80,000 monthly. But his books were chaos. Manual entries ate hours each week. Sales tax mismatched across states. Inventory numbers never matched reality. One day, a tax notice arrived—$12,000 owed from untracked nexus. Alex panicked. He almost lost his business. Then he set up QuickBooks the right way. Automation saved him time, fixed errors, and let him focus on growth.
E-commerce bookkeeping is tough in 2026. Multi-channel sales, complex fees, and sales tax rules demand the right setup. QuickBooks Online (QBO) handles it well—with the correct integrations and configuration.
This guide shows the exact setup every e-commerce store needs. Follow these steps to stay accurate and compliant.
Why the Right QuickBooks Setup Matters
Poor setup leads to wrong reports, tax penalties, and lost profits. Good setup automates data from Shopify, Amazon, or WooCommerce. It tracks sales tax, inventory, fees, and payouts cleanly.Alex learned this. After setup, his monthly close took minutes—not days.
Step 1: Choose the Right QuickBooks Plan
Start with the correct tier.
- QuickBooks Online Plus or Advanced — Best for e-commerce.
- These include inventory tracking and project management.
- Add-ons like QuickBooks Commerce help sync channels.
Step 2: Connect Your Sales Channels
Automate imports to avoid manual work.Use trusted tools:
- A2X or Link My Books for Amazon — Syncs settlements, fees, taxes.
- QuickBooks Shopify Connector or A2X for Shopify — Pulls daily orders.
- Webgility or similar for multi-channel.
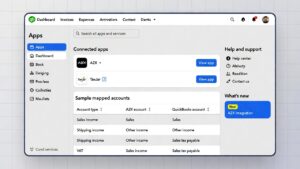
- Go to Apps in QuickBooks.
- Search and connect your tool.
- Link your store accounts.
- Map accounts: sales to income, fees to expenses, taxes to liability.
Step 3: Set Up Sales Tax Correctly
Sales tax is a top pain point in 2026.
- Enable sales tax tracking in Settings > Sales Tax.
- Add your nexus states (from economic or physical triggers).
- Integrate Avalara AvaTax or TaxCloud — They calculate rates at checkout and sync to QuickBooks.
- Map tax collected to a Sales Tax Payable liability account.
Step 4: Configure Inventory and COGS
Track stock to know true profits.
- Turn on inventory in Settings.
- Add products as Inventory items.
- Set starting quantities and values.
- Sync inventory levels via your integration tool.
Step 5: Automate Bank Feeds and Reconciliation
Link your business bank and payment processors.
- Connect Stripe, PayPal, or bank accounts.
- Match payouts from A2X or similar to deposits.
- Review and reconcile weekly.
Common Mistakes to Avoid
Many sellers trip here. Fix them early. 
- Skipping integrations — Manual entry causes errors and burnout.
- Wrong tax mapping — Tax collected posts to income instead of liability.
- Ignoring inventory sync — Leads to negative stock or wrong COGS.
- Not reviewing monthly — Small mismatches grow into big tax problems.
- Using default accounts — Fees get lumped with sales, skewing reports.
One client lumped Amazon fees into sales. Profit looked 15% higher than reality. He overpaid taxes.
Final Thoughts
The right QuickBooks setup turns chaos into clarity. Automate integrations, nail sales tax, track inventory, and reconcile often. You save time, avoid penalties, and make better decisions.
Stories like Alex’s show the difference. He now scales without fear.
Need help with your setup?
Book a free 30-minute QuickBooks review. I map your channels, fix tax issues, and build the exact system for your store.
Get your books right today. Grow without the stress.
Ashfaq helps e-commerce business owners turn messy numbers into clear, reliable financials. With over 15 years of experience, he specializes in bookkeeping for Amazon and Shopify sellers, ensuring accuracy, clarity, and confident decision-making.