QuickBooks Bookkeeping for Amazon FBA & Shopify | Thelonex


Here’s How to Set Up A2X for Shopify
- Home
- Here’s How to Set Up A2X for Shopify
- June 24, 2026
- 6 min read
- No Comments
Here’s How to Set Up A2X for Shopify
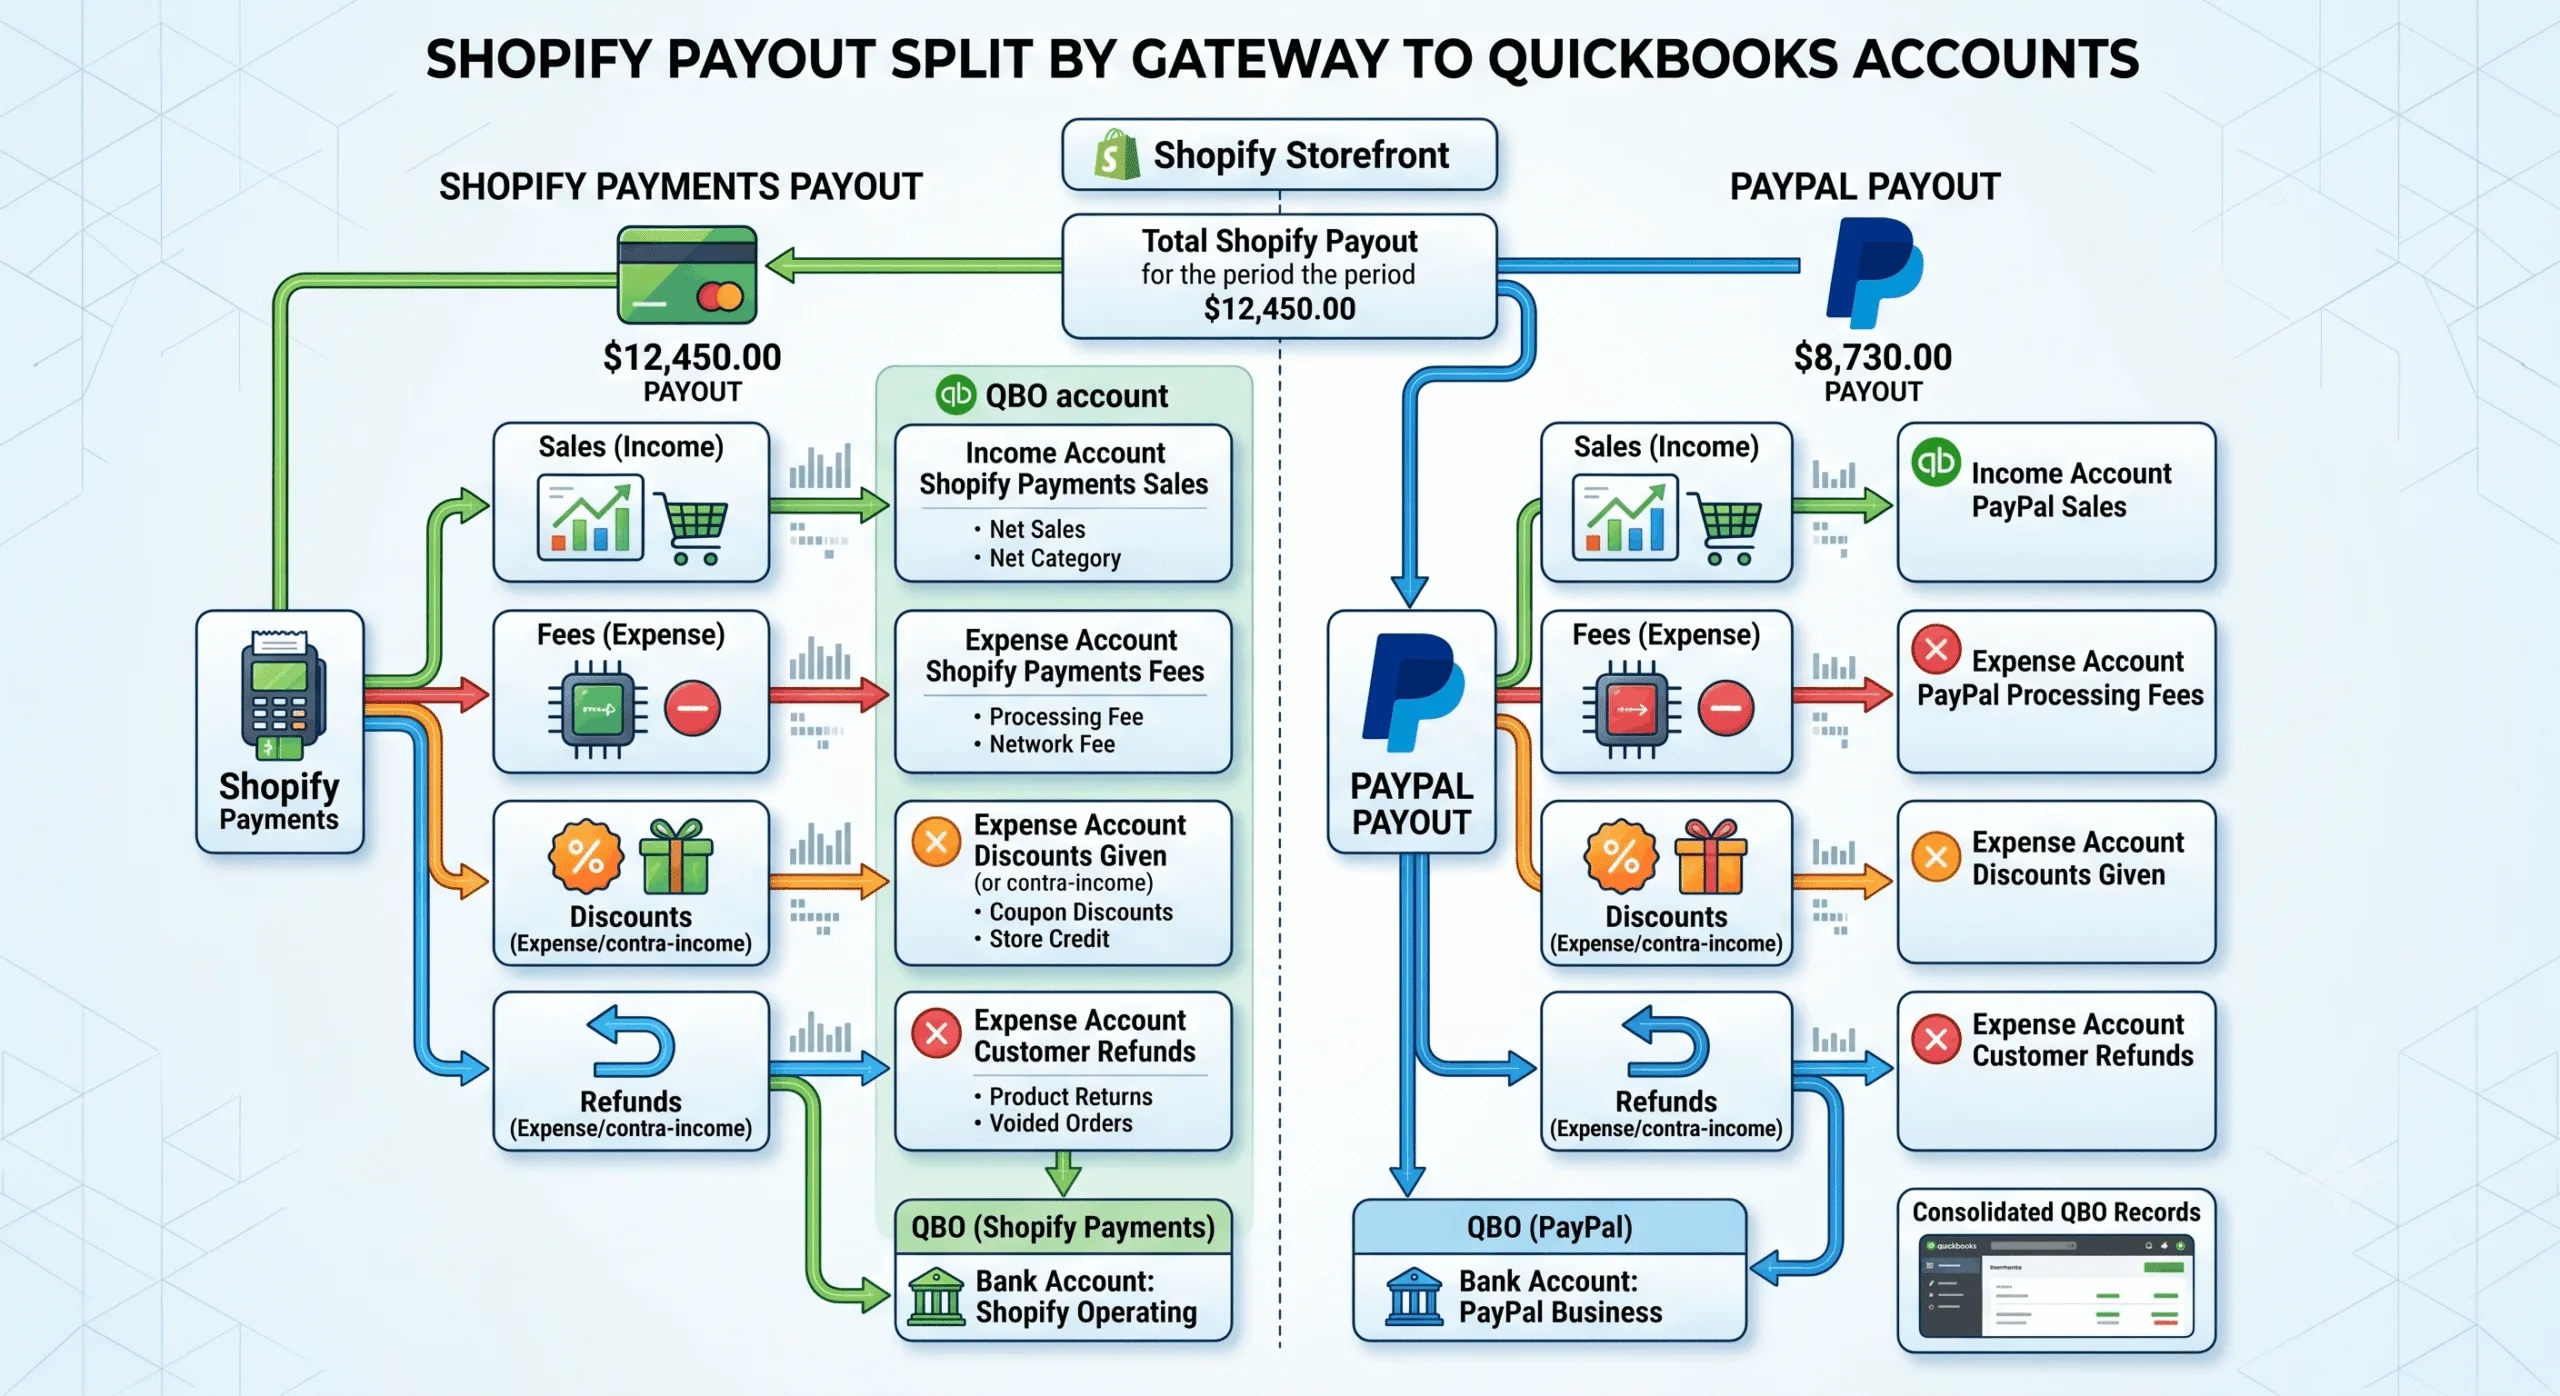
Shopify payouts mix sales, discounts, shipping income, processing fees, and refunds into one deposit. If you also use PayPal or a second gateway alongside Shopify Payments, the math gets messier fast.
A2X sorts all of this into clean QuickBooks entries automatically. This guide covers the full setup for Shopify sellers in the US and Canada, including stores using more than one payment gateway.
By the end, your Shopify store will post accurate, reconciled entries into QuickBooks every payout cycle.
What Is A2X Setup for Shopify?
A2X setup for Shopify connects your Shopify store to A2X, then connects A2X to QuickBooks Online. A2X reads your Shopify payout data and converts it into organized journal entries.
This setup is for any Shopify seller using QuickBooks Online, including stores using Shopify Payments, PayPal, Stripe, or a combination of gateways. If you haven’t connected A2X before, our complete A2X tutorial covers the general connection flow that applies to every platform.
It also supports multi-currency stores, which matters if you sell into both the US and Canada from a single Shopify account.
Why A2X Setup Matters for Shopify Sellers
Shopify deposits do not separate sales from fees by default. A single payout might include hundreds of orders, store credits, discount codes, shipping charges, and processing fees, all combined.
Recording that as one number means your profit and loss statement is guessing, not reporting. You cannot see your real margin without separating these categories.
A2X solves this by splitting every payout into the right accounts before it reaches QuickBooks. This becomes essential once you use more than one payment gateway, since each one settles on its own schedule with its own fee structure.
For Canadian sellers, accurate A2X data also keeps GST/HST tracking correct. See our guide on A2X sales tax tracking, or have our sales tax services team manage provincial filings directly.
Step-by-Step Guide: Setting Up A2X for Shopify
Step 1: Connect Your Shopify Store to A2X
In your A2X account, select Shopify as your sales channel. Authorize A2X to access your store’s order and payout data.
A2X will detect your active payment gateways automatically, including Shopify Payments and any connected third-party processors.
Step 2: Connect A2X to QuickBooks Online
Choose QuickBooks Online from your A2X dashboard and log in to authorize the connection. This allows A2X to post entries directly into your QuickBooks ledger without manual file transfers. If you’re setting up QuickBooks Online for the first time, our QuickBooks setup service builds an e-commerce-ready chart of accounts before A2X connects.
Step 3: Map Your Shopify Accounts
Map each transaction type to its own QuickBooks account. For the full logic behind which account each category belongs in, see our guide to A2X chart of accounts mapping.
Sales should map to your income account. Discounts map to a contra-revenue account. Shipping charged to customers maps separately from shipping you pay as an expense.
Processing fees from each gateway should map to their own expense accounts. Refunds map to a contra-revenue account, separate from discounts.
If you sell in Canada, map GST/HST collected to its own liability account so it stays distinct from US sales tax.
Step 4: Set Posting Preferences for Each Payment Gateway
If your store uses more than one gateway, configure posting settings for each one individually inside A2X. Shopify Payments, PayPal, and Stripe each settle on different schedules and may need separate summary posting frequencies.
Most sellers use one summary entry per payout, per gateway, which keeps QuickBooks organized without losing detail.
Step 5: Post Your First Shopify Settlement
Review the payout summary in A2X before posting. Confirm the net amount matches what actually deposited into your bank account.
Once confirmed, post the entry. A2X will split it across the accounts mapped in Step 3.
Step 6: Reconcile the Payout in QuickBooks Online
In your QuickBooks bank feed, match the A2X entry to the corresponding bank deposit. A clean match means reconciliation is done for that payout.
If amounts do not match, check whether a gateway fee or currency conversion was mapped incorrectly. Multi-gateway and multi-currency stores are the most common source of mismatches — our guide to common A2X sync errors and how to fix them covers the usual culprits.
Practical Tips for Better Results
- Map each payment gateway separately if you use more than one. Combining Shopify Payments and PayPal into a single mapping makes it impossible to see which gateway costs more.
- Keep shipping income and shipping expense in separate accounts. Mixing them hides whether you are profiting or losing money on shipping.
- For Canadian stores, map GST/HST as its own liability account from day one. Retroactively separating tax data is far more time-consuming than setting it up correctly at the start. Our A2X sales tax tracking guide explains how this flows into your filings.
- Reconcile every payout, not just monthly. Shopify can settle weekly or even daily depending on your gateway, so monthly reconciliation lets errors stack up.
- Double-check currency settings if you sell in both USD and CAD. Misconfigured currency mapping is one of the most common A2X setup mistakes for cross-border Shopify stores.
- Avoid posting a settlement before reviewing it. A rushed review is the easiest way to carry forward a mapping mistake across every future payout. Revisit the account mapping in Step 3, or our full chart of accounts mapping guide, any time something looks off.
Conclusion
A2X setup for Shopify replaces a confusing mix of payout data with clean, categorized QuickBooks entries. The gateway mapping step takes the most attention, especially for multi-currency or multi-gateway stores, but it pays off in accurate reports every cycle.
For the full connection process that applies across both Amazon and Shopify, see our complete A2X tutorial. If you are setting up QuickBooks Online for the first time alongside A2X, our QuickBooks setup service can configure both together.
Want it done right the first time? Book a free consultation with Thelonex and get your Shopify A2X connection set up by a QuickBooks-certified team.
By:

Ashfaq helps e-commerce business owners turn messy numbers into clear, reliable financials. With over 15 years of experience, he specializes in bookkeeping for Amazon and Shopify sellers, ensuring accuracy, clarity, and confident decision-making.
Categories
Latest Posts
- August 2, 2026
Amazon Seller Connector by QuickBooks: Complete Guide
- July 21, 2026
How COGS Accounting Works for Canadian FBA Sellers
Tags
A2X
Accounting Method
Amazon FBA
Amazon Marketplace Connector
Amazon Seller Central
Amazon Seller Connector
Bookkeeping Tips
Canada Tax Registration
Canadian Bookkeeping
Canadian Sales Tax
Chart of Accounts
COGS
E-Commerce
E-Commerce Bookkeeping
Finance
Financial Statements
GST/HST
Inventory
Payout Reconciliation
Profit and Loss
QuickBooks Online
Sales Tax
Sales Tax Compliance
Shopify
TaxCloud